Thursday, February 26, 2015

St. Patrick's Day "Lucky" Mug DIY

It's almost March!  St. Patrick's day is around the corner in all its green glory.  Do you know what else is glorious?  I found a gold metallic oil-based Sharpie the other day!!  After the fun I had with the blue paint marker that I used on my hand painted plate , I just had to have the gold, and snagged a "clover" green one too while I was at it.  Like this adorable "Lucky" mug!? It's as easy as it looks to make.  I couldn't pass up the adorable mug and spoon set when I saw it at the craft store either.  The spoon slips right into a little holder on the handle of the mug. Perfect, no? Wanna make a "Lucky" mug too?
You will need:
-Gold metallic Sharpie oil-based paint pen
-Green Sharpie oil-based paint pen
-White ceramic mug and (if desired) small ceramic spoon to match
-Letter Stencils or stickers to trace
I had some stickers laying around and they were the perfect font so I stuck them on the mug and gently traced with a pen marker (not permanent because I'll wipe it off when I'm done painting).  Then I peeled the stickers off, careful not to smear my wet trace lines...

I used the paint pens to fill in my designs and when it was dry (after about a minute) I wiped away my trace line gently with a wet rag.  
Bake at 350 degrees for 30 minutes!


For someone like me, who isn't huge on the color green, this little set is the perfect way to bring out a little holiday flair.  It would make a great gift for any friends or coworkers who are big on St. Paddy's Day too!


FOLLOW ATTIC LACE ON BLOGLOVIN!

Tuesday, February 17, 2015

3-Step Blueberry Vanilla Bread Pudding

Bread Pudding is my weakness, especially during the winter months when it becomes a hearty and sweet comfort dessert.  Rich and moist in flavor, I prefer it with a fruit that cuts in with a little tartness and tang.  Fresh blueberries are perfect for this. Bread pudding is as simple to make as french toast, except you don't have to watch a pan because you simply pop it in the oven.  It's also an excellent solution for day-old breads and rolls.

Blueberry-Vanilla Bread Pudding

4 Cups bread cut into large cubes (I used up 3 leftover deli rolls)
2 Cups Milk
1/4 Cup Butter
2 Large, or 3 small eggs
1/2 cup sugar
1 Tsp Vanilla Extract
1/4 Tsp ground nutmeg
1 Tsp ground cinnamon
Pinch of salt
2 Cups fresh blueberries

1. Preheat oven to 350 degrees F.  Heat milk and butter in a saucepan over medium heat until butter has melted.

2. While milk and butter heat on stove, in a large bowl combine eggs, sugar, vanilla, nutmeg, cinnamon and salt until well blended.  Toss in cubed bread and berries and combine gently.

3. Pour the warm milk and butter into bowl reserving a small amount in the saucepan.  Stir bread mixture to coat and pour into a deep  un-greased pan.  Pour remaining milk/butter mixture over the top and bake for approx. 45 min.  Berries will bubble and a toothpick inserted in center will come out clean when done.

Serve Warm!  (Excellent with a bit of ice cream on top too)

While I usually like a sauce on my bread pudding, I feel none is needed here.  The blueberries cook down and create such a perfect sauce of their own that just a bit of powdered sugar tops things off perfectly.  You may also choose to spoon some of the juices out from the bottom of your baking pan to pour over the servings.  

Hey!  Remember my Easy Hand-Painted Plate ?  Doesn't it make the prettiest charger for this dessert plate?

Enjoy!

FOLLOW ATTIC LACE ON BLOGLOVIN!


Friday, February 13, 2015

Valentine's FREE PRINTABLE


Scrambling for last minute valentines!? I've got you covered! I finally decided to try my hand at a free printable for you guys, and here it is! My Valentine to you. Simply click the link below to download... 


I hope you all have a wonderful Valentine's day!

*Printable contains original artwork by Sarah LoCascio and is for personal use only.  Please be respectful.


FOLLOW ATTIC LACE ON BLOGLOVIN!


Monday, February 9, 2015

How to Make Low, Full Floral Arrangements (For under $15!)

Something like the floral arrangement above would cost around 50 - 75$ from a florist or floral delivery company.  What if we could make this for under $15.00!?  Believe it or not the flowers used in this arrangement came from the supermarket.  I've spoken before about how easy it is to make a swoon-worthy bouquet from simple grocery store flowers.  I also want to share another neat trick with you today, and that is my go-to method for creating low and full vases.  Let's get started!
You Will Need:
-5" round vase
-Small bunch of tea roses
-2 Large blooms
-A mix of medium and small blooms
-Clear Tape (Scotch or packing)
-Scissors
-(A couple of rubber bands)
MAKE A TAPE GRID
This step is what's going to make or break the arrangement.  A little trick I learned while assisting floral stylists on photo sets, the "tape grid"!  This neat little secret enables you to build the arrangement without the risk of certain flowers slipping down in the vases. It's a simple cheap way of creating stability for your flowers.  Much cheaper that floral foam and also perfect for glass vases where you want to steer clear of seeing foam at the bottom.

Cut thin strips of the clear tape and stretch tightly across the top of your vase (tic tac toe style)  You'll probably only need 4 strips of tape like I did.
ADD THE BIGS
Starting with your biggest, fullest stems cut the excess stem off at a sharp angle.  Cutting a clean sharp angle on the bottom of the stems allows the flower to properly draw water, you'll want to do this on all stems. Place the large blossoms into the outer squares that the tape grid created.  We're going to build the rest of the arrangement on top of and around these big beauties.

ADD THE MEDIUMS
Make 3 bunches of the tea roses, gathering them into groups and securing with rubber bands.  (Notice the importance of removing leaves and stranglers from the stems of everything.)  Insert rose-bunches into the center of the tape grid.

ADD THE SMALLS
After you've placed the rest of the medium stems, go around filling any spaces with the rest of your small blooms, like these small white variegated daisies.  I like to insert them in groups of three.
YOU'RE DONE!
You should now have a beautiful full arrangement.  You will have noticed how easy it is to control the positioning of each flower with the tape grid in place and it's completely undetectable once the arrangement is complete.
MAKE IT A GIFT!
If this is a gift, perhaps for a special valentine, it's easy to personalize the arrangement with ribbons and maybe a sweet tag or card
Happy arranging!  I bet you use the tape trick all the time now, I know I do!

FOLLOW ATTIC LACE ON BLOGLOVIN!

Wednesday, February 4, 2015

Valentine Candy Vials

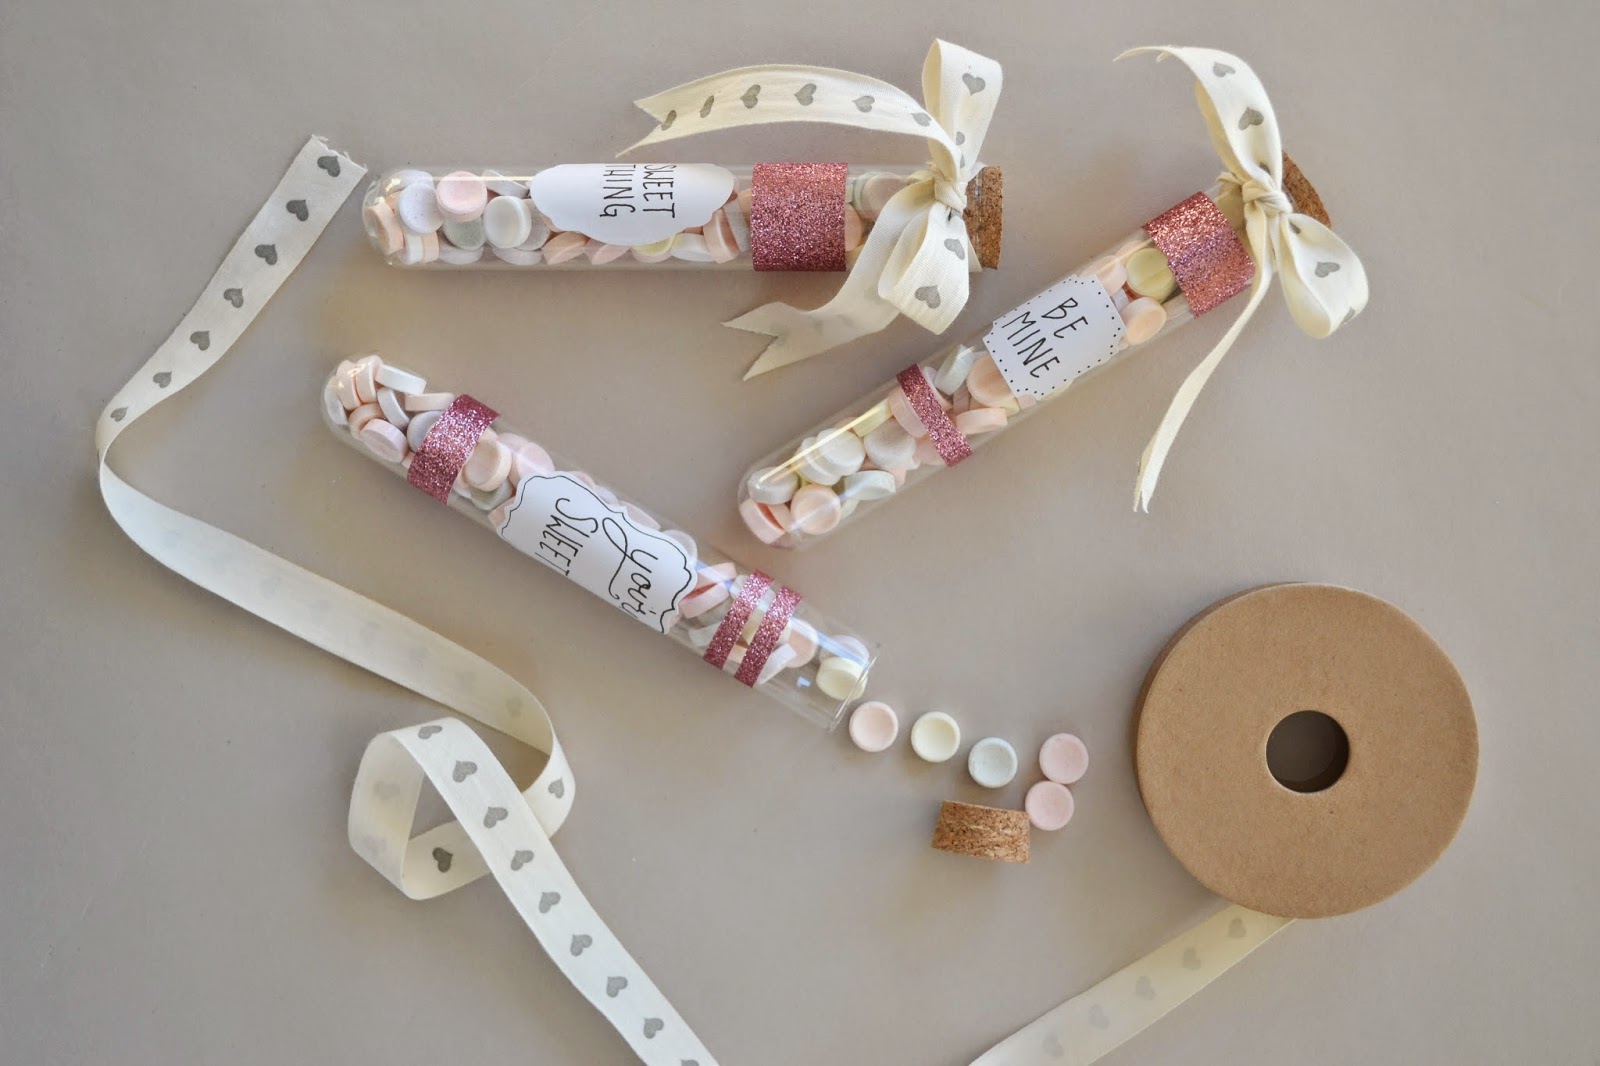
February, the month for love, is here and it's time to start thinking about what little goodies we'll be handing out to friends and family.  I love to find fun new ways to present candy, the Valentine's Day favorite. Last year I made Valentine's in a Jar, which were pretty darn cute, a hit with all my Valentine recipients.  This year I found these awesome large vials that are perfect for filling with your favorite sweets.  They were about a buck each at the local craft store, and I'm sure they're also available online.  Here's how I customized them for my Valentines!
You Will Need:
-Large corked vials (if you're giving them to kiddos, be sure they're plastic!!)
-One inch wide glitter tape
-Sticker labels
-Ribbon
-Small hard candies or a love note 
-Scissors
Start by adhering lengths of the glitter tape to each vial.  You can do wide stripes, narrow stripes, a combination of wide and narrow etc.  I did a few variations, with wide shown above.

Hand write little sayings or names on your sticker labels and stick to the fronts of the vials. Now you're ready to fill them candy!!
As you fill each vial with candy, tie a piece ribbon in a little bow around the top and you're done! (How cute is that ribbon, right!? Part of a birthday gift from my brother and his lady. I'm completely smitten with it!)

Ready for February 14th!  I can't wait to hear how my Valentines like their sweet candy-filled vials.

FOLLOW ATTIC LACE ON BLOGLOVIN!