

Those of you who follow Attic Lace on Instagram know that I recently completed a large wall hanging for our new den space. I had such a blast making it that I thought I'd share my technique with you.

DIY Wall Hanging
You will need:
-Medium stick, or wooden dowel
-Yarn of your choice, at least one full skein (I used remnants of skeins I had lying around)
-Sharp scissors
Step 1. Estimate the desired length of your wall hanging, then add a few inches extra (not a fine science, just eyeball it).
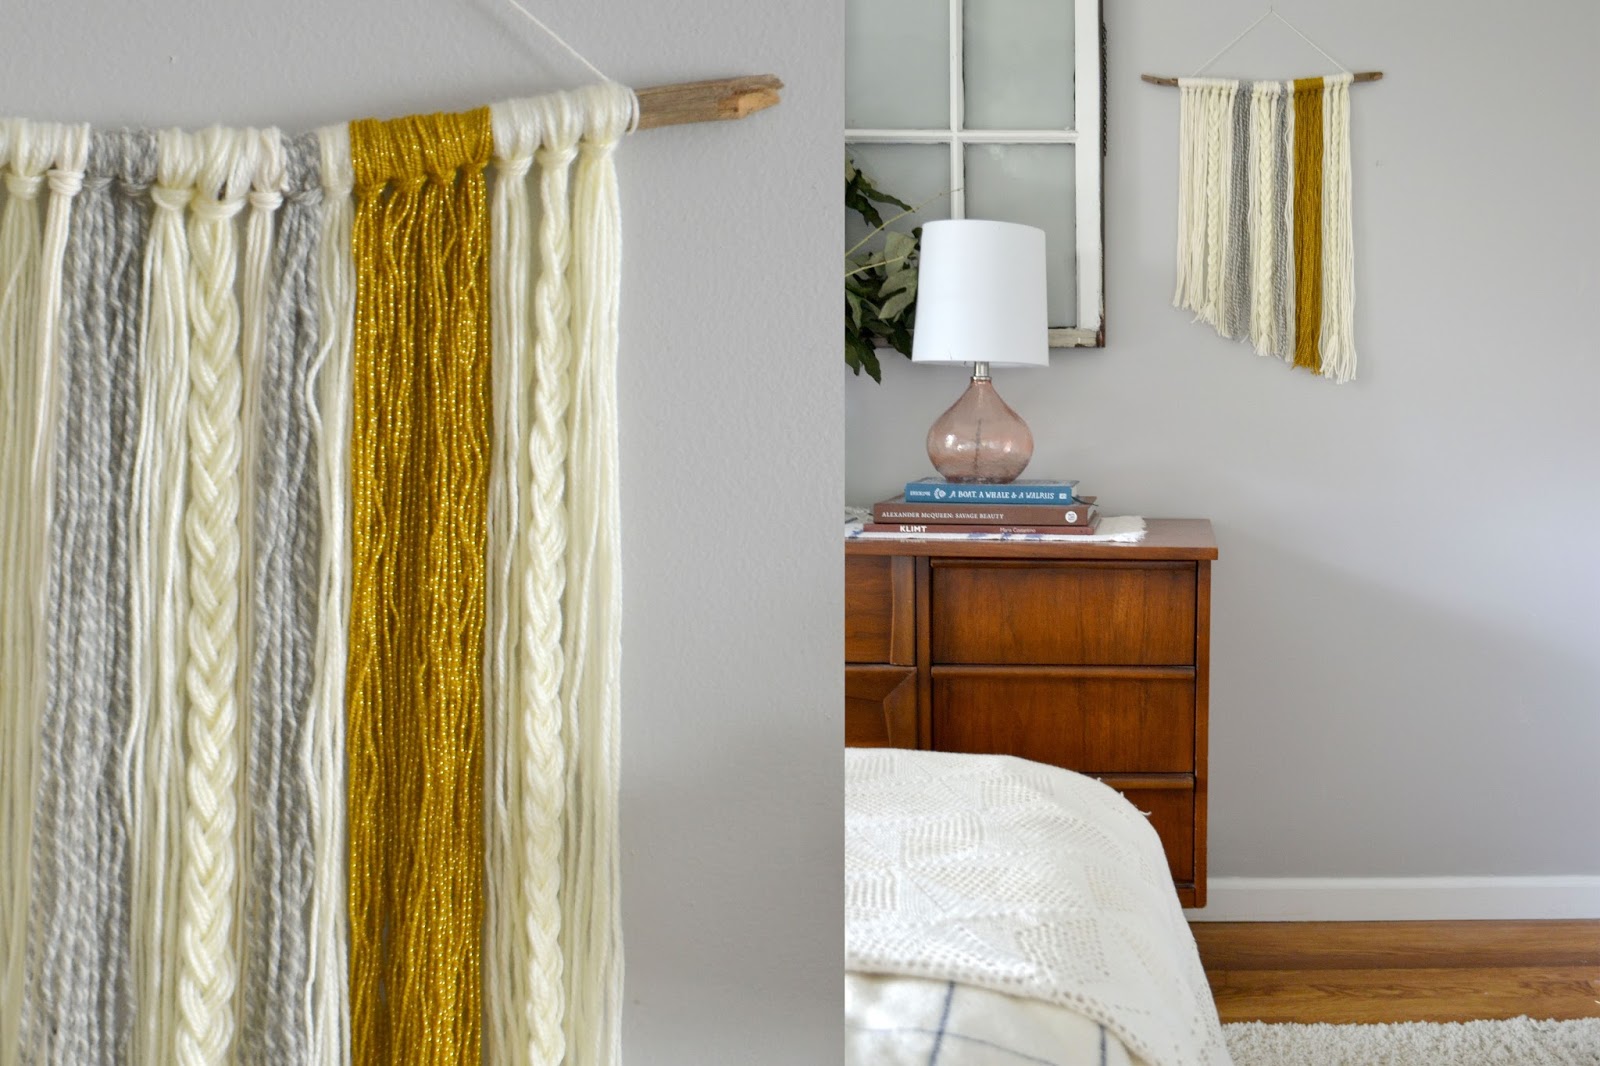
Step 2. Pull the yarn into approx. ten loops of your desired length (see photo below) keep your cut ends down, and your looped ends at the top.
Step 3. Pinching the top, where your loops or "middles" are, go around the stick and then pull the ends of the yarn through center (refer to photos). You should now have a neat looped knot and your yarn will be secured to the stick. Repeat this step, along the length of the stick, switching colors along the way if desired.
Step 4. Once your length is complete, go back in and braid some sections to give it a little texture and dimension. Tie your braids with scrap yarn at the bottom.
Step 5. Using a straight edge (I used a large cutting board that had a nice flat edge) and a sharp pair of scissors, trim the bottom of your work. You may want to trim straight across, or at an angle like I did. Tip: Using your fingers, brush all strands downwards so that everything is straight and lies flat before trimming.
Hint: If you trim off the tied end of your braid, simply grab another scrap and retie the end so the braid doesn't unravel!
Step 6. Attach an extra piece of yarn along the top for hanging and your done!


How simple is that! This project cost me nothing and even if you have to buy a bundle of yarn to make your own, the whole thing should still be under 10$. It took maybe to an hour to complete and I am so thrilled with how it looks hanging in our home. Right on trend!
FOLLOW ATTIC LACE ON BLOGLOVIN!
I really appreciate on your post.... and I got an useful information about the matter... I just tried to write the same post.
ReplyDeleteDry Lace