Make A Serving Tray
After putting my new thrifted floral sheets on the guest bed, I started thinking about what I could add to the bedside table in the guestroom to make it feel a little more welcoming (I also picked up some pretty new paper recently that left me feeling really inspired). I decided some pretty serving trays were just the thing! They could be used to hold reading material, special snacks, flowers...really anything that you might leave for a guest to make them feel more comfortable. Here's how easy it is to make some sweet and personal trays!
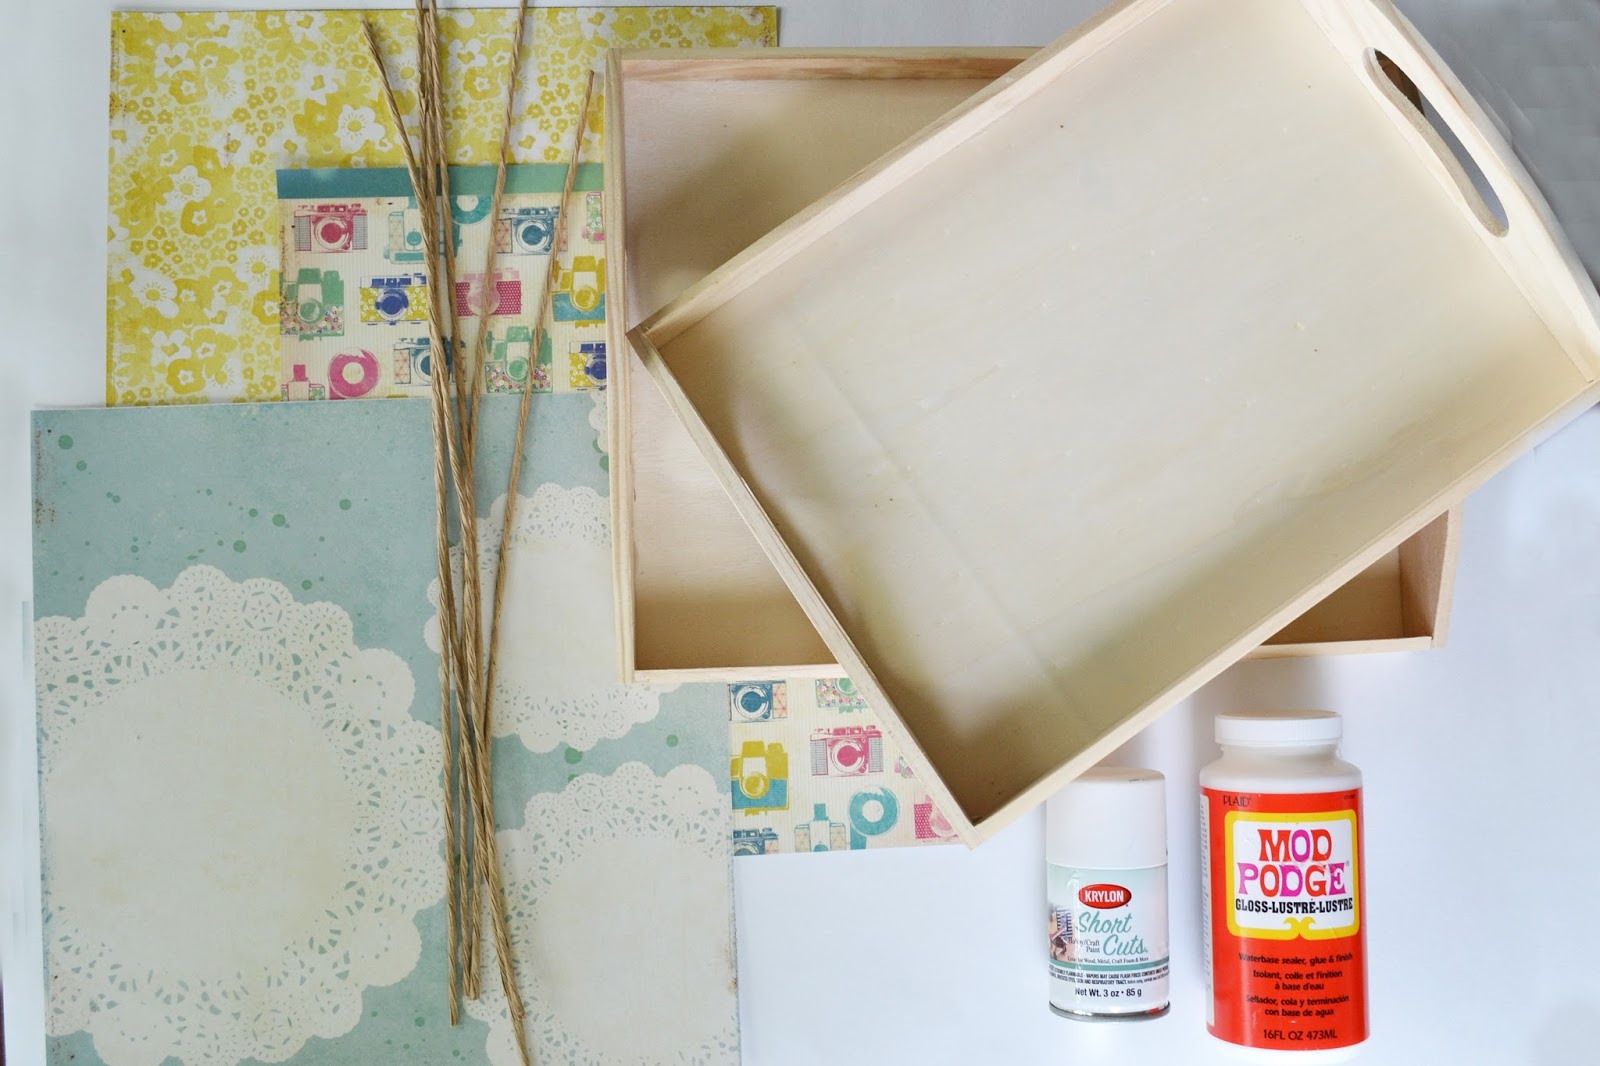
You will need:
-1 or more plain wooden trays (I got mine at the local craft store. $5 for a set of two)
-Scrapbook or other type of paper for decoupage
-White spray paint
-Med grit sand paper
-Brown-paper wrapped floral wire
-Mod Podge
-Hot glue gun
Give your trays a single coat of matte white spray paint. Don;t worry about coverage on the inside bottom of the tray since we'll be covering that area with the decorative paper. Let fully dry.
Take your sandpaper and lightly sand all of the edges to give it a worn-in feel. It helps to think of the parts that would naturally be worn after some use (handles, corners etc.) and hit those a little harder to make it all look realistic. Wipe with a damp cloth to remove dust.
Choose your paper, and cut to fit the bottom of the tray. My paper wasn't quite long enough on one side of the larger tray so I had to piece a bit in.
Spread a very thin layer of Mod Podge on the bottom of the tray and smooth the paper on. Let dry. Do the first top coat, brushing the Mod Podge on evenly over the entire surface, making sure to secure all corners and edges down as well.
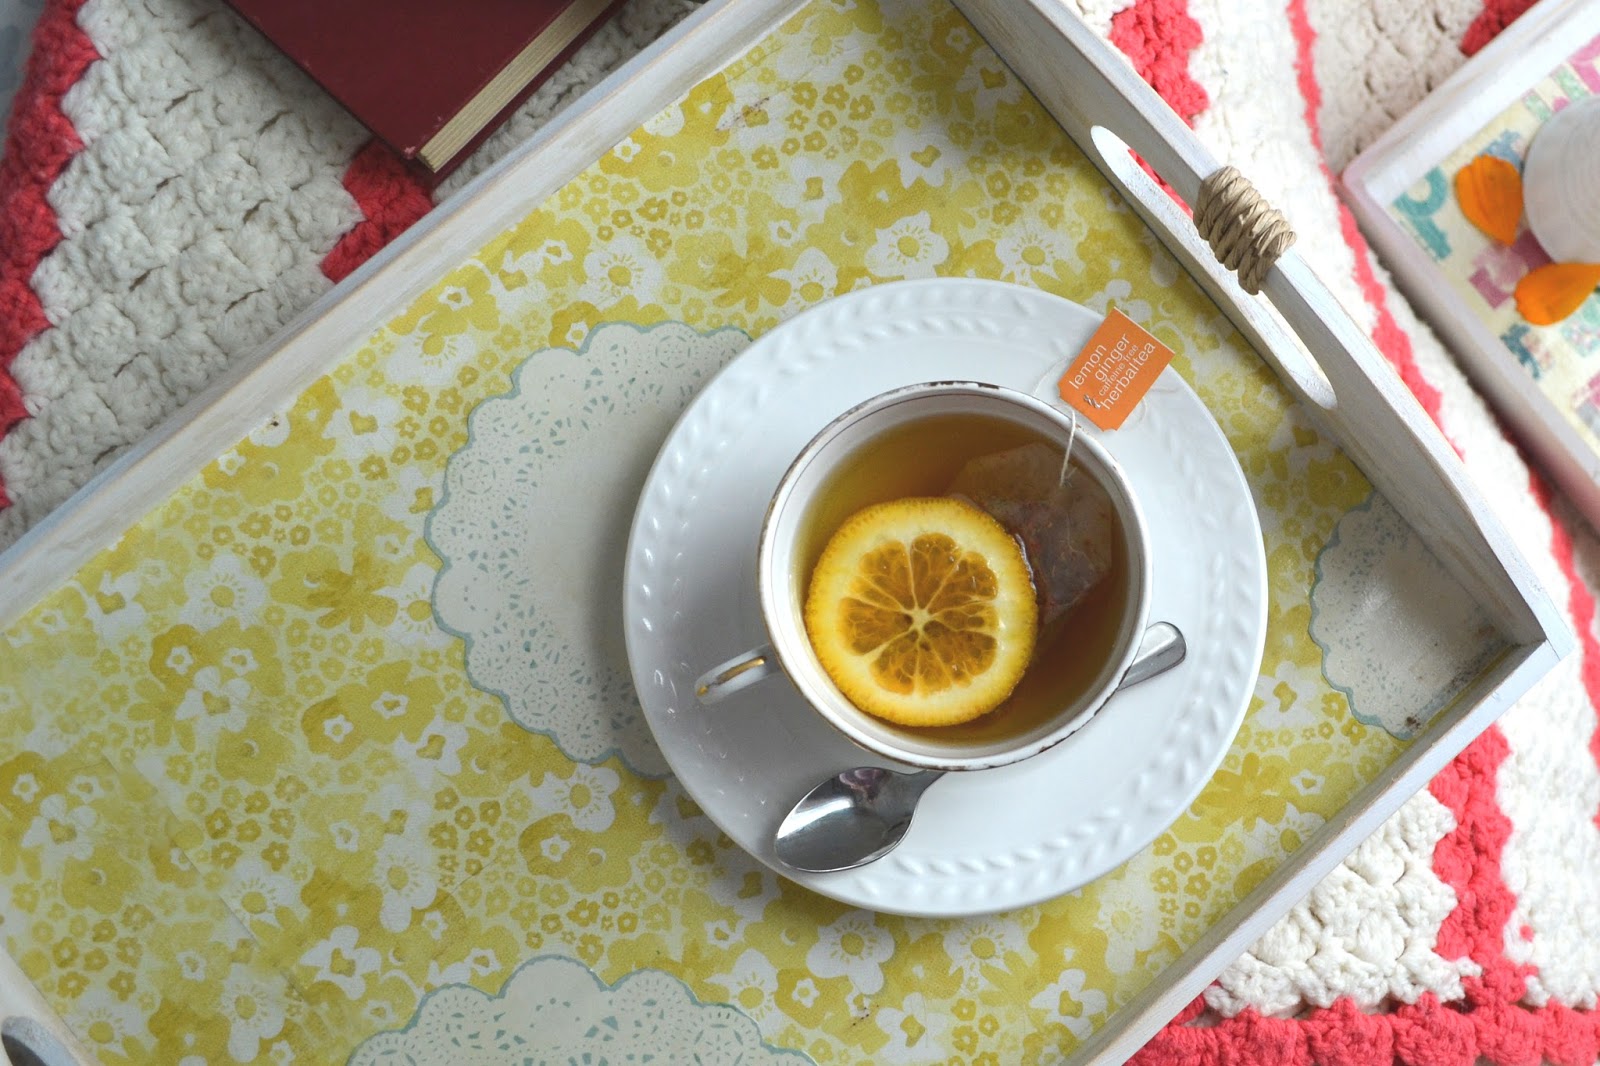
Add any additional paper embellishments. I added these cut out paper doilies to my big tray.
Then do two or three more coats of the Mod Podge, letting each dry in between (I always follow the directions on the back of the container).
Add your wrapped wire to the handles on your trays by neatly wrapping in around the top part of the tray handle. Glue the ends down with a dot of hot glue.
(When completed, you may want to give the whole thing a few coats of clear-coat spray for added protection and sealing.)
I really love the happy patterns on these, and I can't wait to load them with little goodies and books when our next guest comes to visit!!
FOLLOW ME ON BLOGLOVIN!


These are so cute. I really love the camera pattern. I've done similar things with scraps of fabric, so this seems very doable. The wrapped wire really gives it that extra something. Thanks for sharing!
ReplyDeleteThe Rambling Fangirl
Thanks Christina!! Aren't the cameras cute??:)
DeleteThey turned out gorgeous!
ReplyDeleteThank you!!Xo
DeleteThese came out so cute! And they're totally useful. I love the rope detail on the handles.
ReplyDeletexo
LesliMarie
www.linenandtulle.com
Thanks Lesli:)
DeleteI'm looking at the raspberry and white striped throw that your trays are sitting on - so pretty!
ReplyDeleteAh good eye Lisa!! That was one of my nifty thrifty items from last week! only $5:))
DeleteThese are so great!
ReplyDeleteYou've made me want to run to the craft store and get lost in its isles of helpful, beautiful stuff :)
I love the camera print! I'm sure your guests will love these trays.
ooo Anabel, If you ever can't find me that's usually where I am...lost in the aisles of the craft store haha:)
Deletewow, these are positively wonderful! beautiful job!
ReplyDeletexx
Thanks!!:)
Delete